
How to Install a Dash Cam Step by Step

Install a dash cam by choosing the power method first, mounting the unit high behind the mirror, routing the cable with trim tools, and confirming ignition and recording before you drive. Bad routing or the wrong power tap can drain the battery, trigger faults, or leave you with no footage when you need it. This guide covers front and rear installation, hardwire versus 12V choices, cable routing, and final checks.
What you’ll need
- Dash cam with front-facing or front-and-rear support, plus its mount
- MicroSD card rated U3 or a compatible speed class, with a capacity the camera supports
- Windshield cleaning cloth and glass cleaner
- Trim tools for lifting headliner or trim edges without marring them
- Cable clips or adhesive cable guides
- Power cable for the chosen method: a cigarette lighter adapter, a hardwire kit, or an OBD power cable if the camera supports it
- Fuse taps and basic fuse-box tools for hardwire installs
- Rear camera module and the included extension cable, if your camera has one
- Optional polarising filter if your model supports it
- Small flashlight for checking fuse labels and cable paths
Next, confirm whether the camera supports app setup, rear modules, and your chosen power method before you start pulling trim. Nextbase says standard SD cards are not recommended, so the card choice comes before the mount goes on the glass.
Which power method should you choose?
Choose the power path before you stick the camera to the glass. A cigarette lighter adapter is often the simplest option, a hardwire kit is a common choice for parking mode, and an OBD power cable may fit some vehicles if the product supports it. Many dash cams are designed for broad compatibility, but hard-wiring still needs the right vehicle connections.
| Install method | Required parts | Effort | Parking mode | Common failure points |
|---|---|---|---|---|
| Cigarette lighter adapter | 12V accessory plug, dash cam power cable, cable clips | Low | Maybe, only if the socket stays powered when parked | Socket turns off with ignition; loose plug; dangling cable |
| Hardwire kit | Hardwire kit, fuse taps, fuse box access, trim tools | Medium | Yes, if the kit and camera support it | Wrong fuse choice; poor ground; incorrect constant or accessory tap |
| OBD power cable | OBD cable, camera that supports it, cable clips | Low to medium | Sometimes, depending on the cable and camera | Port compatibility issues; cable may sit in the footwell if not routed well |
| Battery pack | Compatible battery pack, charging cable, mounting space | Medium | Yes, for many setups | Needs room, extra cost, and proper charging path |
Use the 12V adapter if you want the quickest install and you do not need parked recording. Use a hardwire kit if you want parking mode, because BlackboxMyCar says parking recording needs suitable power and lists a hardwire kit as connecting to the vehicle’s electrical system. If your camera supports an OBD cable, that can be a middle path for some vehicles.
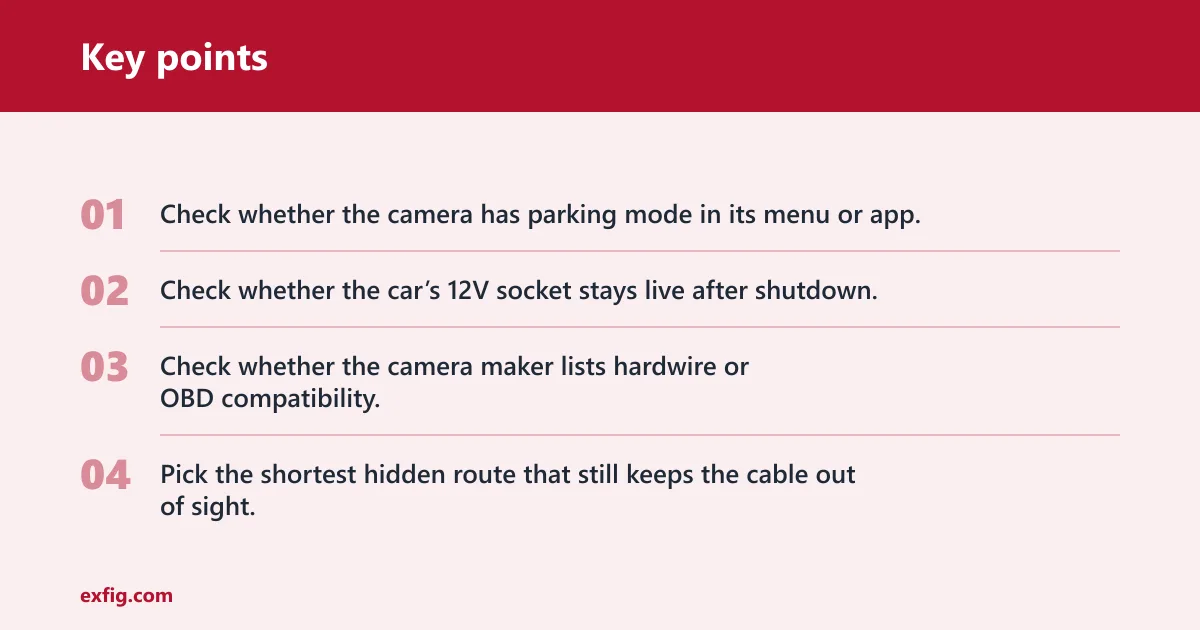
Decision logic before you start
- Check whether the camera has parking mode in its menu or app.
- Check whether the car’s 12V socket stays live after shutdown.
- Check whether the camera maker lists hardwire or OBD compatibility.
- Pick the shortest hidden route that still keeps the cable out of sight.
If the camera has no parking mode feature, a hardwire kit will not add it. If the socket cuts power with the key, the camera will stop recording when parked. That is normal for many plug-in installs.
How do you install a dash cam step by step?
Start with the windshield, card, and power choice. Then mount the camera high and centered, route the cable along the headliner or windshield edge, and verify that recording starts before driving. Most models install quickly, and TechRadar notes that little technical skill is usually needed unless you hardwire it.
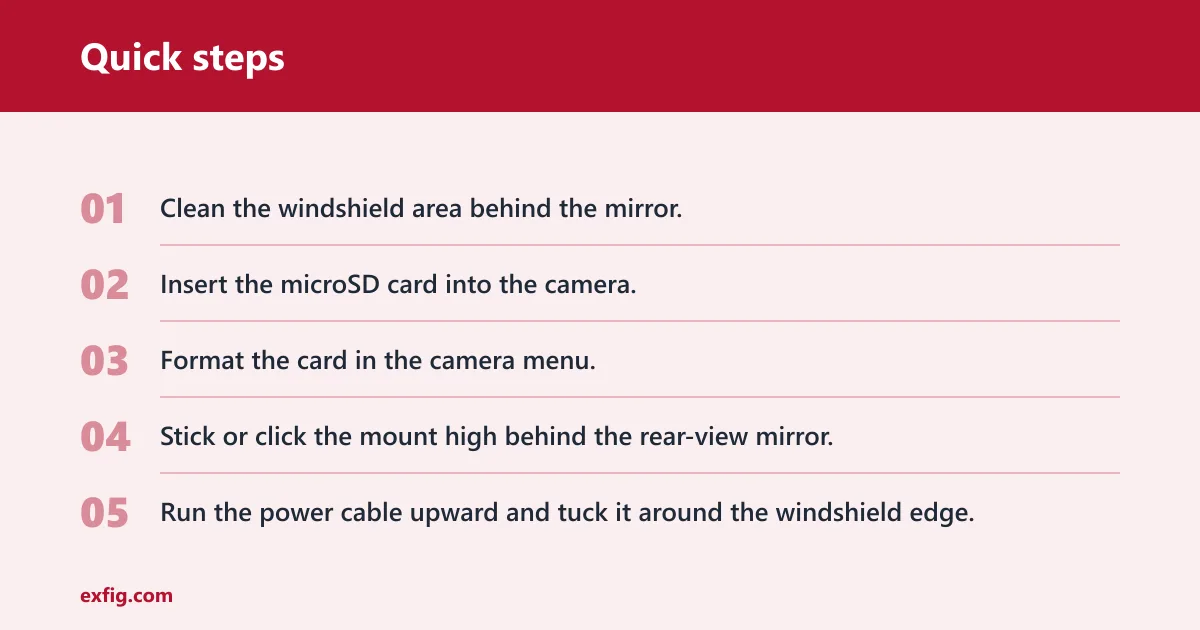
- Clean the windshield area behind the mirror.
- Insert the microSD card into the camera.
- Format the card in the camera menu.
- Stick or click the mount high behind the rear-view mirror, clear of the driver’s sightline and within any legal or manufacturer-recommended mounting zone.
- Run the power cable upward and tuck it around the windshield edge.
- Feed slack into the headliner and A-pillar trim without pinching it, and keep it out of curtain airbag deployment paths.
- Connect the plug to the 12V socket, hardwire kit, or OBD cable.
- Power on the camera and confirm that recording begins.
- Set language, country, time zone, and date in the app or on-device menu.
Mount position matters. Put the unit high enough to keep the road in frame, but not so low that it blocks your view. A common first-timer mistake is placing the camera below the mirror, where it hangs into the driver’s sightline and makes the cable harder to hide.
Windshield mount and cable path
Use an adhesive mount if the camera stays in one vehicle, or a click-on style if you want easier removal. The same source says the cable should be guided around the windshield. That usually means tucking it into the upper edge of the glass, then dropping it only where needed near the power source.
Picture a compact sedan with a narrow mirror housing. A mount that sits just behind the mirror can stay hidden and keep the lens centered. In a taller SUV, the same camera may need a slightly longer drop from the headliner to reach the fuse box or socket cleanly.
How do you install a rear dash cam?
Install the rear camera after the front unit is fixed, because the front camera is usually the power and control point. The same source says rear camera options include rear window, rear view, and cabin view cameras. Route the cable from front to rear in one continuous path so it does not cross loose trim or end up visible across the cabin.
Rear-camera routing by vehicle type
- Sedan: Run the cable along the headliner to the B-pillar, then continue to the rear glass or parcel shelf area.
- Hatchback: Leave extra slack for the liftgate hinge area so the cable can move without pulling on the connector.
- SUV: Plan a longer run, often along the roof edge to the cargo area or rear glass.
Use the cleanest hidden path, not the shortest exposed one. Rear camera modules add coverage for tailgaters and rear impacts, but they only help if the connector is fully seated and the cable does not bind when the hatch opens.
Suppose a hatchback rear feed cuts out every time the liftgate closes. The issue is often cable tension at the hinge or a pinched connector near the trim. Leave extra slack there, then recheck the feed before closing the panel fully.
Common mistakes and failure checks
Fix these before you drive away. The most common problems are wrong mount height, bad card choice, loose power, and rear-camera cable trouble. If parking mode fails, check power first; if video skips or files disappear, check the card and format.
| Check | What to verify | What failure looks like |
|---|---|---|
| Mount height | Camera sits high behind the mirror and does not block the road view | Lens points at dashboard or blocks the driver’s sightline |
| Card type | U3 or compatible card, supported capacity, formatted in-camera | Recording errors, file corruption, or loop recording failure |
| Power connection | Plug, fuse tap, or OBD cable fully seated | Camera shuts off on bumps or when the car starts |
| Rear feed | Cable connected at both ends and not pinched at trim points | No rear image, flicker, or intermittent cutout |
| Parking mode | Enabled in the app or on-device menu with suitable power | No motion or impact recording after shutdown |
If that did not work, try this next: remove the card, format it in the camera, and test again. If the rear camera still fails, reseat the rear connector and inspect the hatch or trunk hinge area for pinch points. If parking mode still will not arm, check whether the socket loses power when the ignition is off; if it does, a plug-in setup will not hold parking recording.
Post-install checks before driving
| Check | Pass condition |
|---|---|
| Recording starts | Front camera begins recording after power-up |
| Time and date | Matches the correct time zone and current date |
| View angle | Road fills the frame without hood-heavy framing |
| Rear feed | Rear image appears and stays stable |
| Card status | No card warning or format prompt remains |
| Power cable | No loose loop hangs below the dash |
| Parking mode | Menu shows the feature enabled, if supported |
| App pairing | Wi-Fi or Bluetooth connection completes |
| Firmware | Updates finish without an error message |
| Playback | A saved clip opens and plays back clearly |
Plan for extra time if you are hardwiring or fitting a rear camera.
Frequently asked questions
What tools do I need to install a dash cam?
Use trim tools, a microfiber cloth, glass cleaner, cable clips, and the camera’s power lead. For hardwiring, add fuse taps, a fuse tester, and access to the fuse box. Use the test tool to confirm which fuse is switched and which is constant before you tap anything, and avoid safety-critical circuits such as airbags and other essential vehicle systems. A flashlight helps with labels and trim gaps, especially when routing through the headliner or behind an A-pillar.
Where should I mount a dash cam on the windshield?
Mount it high behind the rear-view mirror so the lens has a clear road view and the body does not block your sightline. Keep it close enough to the headliner that the cable can disappear upward, then drop only where needed. Avoid low placement near the wipers or dashboard reflection zone.
Do I need to hardwire a dash cam for parking mode?
Usually yes. Parking recording needs suitable power, and a hardwire kit is the common path because it connects to the vehicle’s electrical system. If the 12V socket stays live after shutdown, a plug-in setup may work, and some battery packs or OBD or OEM live-socket setups can also support parked recording, but many cars cut that socket off with the ignition, which stops parking mode.
Can I install a dash cam without hardwiring?
Yes. A cigarette lighter adapter is the simplest power option and is often enough for front-only recording. That setup is easier to remove and avoids fuse-box work. The tradeoff is that the camera may shut down with the car unless the socket remains powered when parked.
How do I route the cable so it looks clean?
Run the cable upward first, then tuck it along the windshield edge and into the headliner where possible. Use trim tools to slip it behind the A-pillar cover and secure any loose length with clips near the fuse box or socket. If your vehicle has curtain airbags, keep the cable outside the airbag deployment path and avoid stuffing it behind trim where the airbag may deploy. Leave enough slack for mirror adjustment and door movement, but not enough to hang.